
Table of Contents
ToggleReading Time: 6 minutes
Introduction: Understanding the Medium
Lithography is a printmaking process that involves creating a design on a flat surface, typically a stone or metal plate, using a greasy substance (such as a specially prepared ink or a crayon). The surface is then chemically treated so that the ink adheres only to the areas with the design, while the rest of the surface repels the ink. Finally, the inked surface is pressed against a sheet of paper or other material to transfer the design onto it. Lithography can produce high-quality, detailed prints with a range of tonal values and colors, and it has been used for a variety of printing applications, including advertising, fine art, and book illustrations.

The Invention: Alois Senefelder and the Stone Press (1796)
Lithography is a type of printmaking & it was invented in 1796 by the German writer and actor Alois Senefelder, and was initially used primarily for music scores and maps. Lithography can be used to print text or pictures on paper or other suitable material.

From Maps to Pop Art: Lithography in the Modern Era
Lithography is a printing medium that uses a stone press on which parts are made ink acceptable, other regions do not. The word “litho” means stone, related to using a stone press. Lithography is mainly used in modern-pop art and printing.

The Lithography Process: A Step-by-Step Guide

Step 1: Surface Preparation (Graining)
At first, the limestone should be granulated well with white sand and a little water to make the surface. Then the limestone should be washed by graining it well, then when it is dry the 4 sides of the limestone should be well filled. Then you have to draw on the limestone.

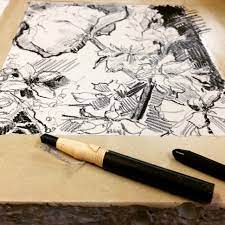
Step 2: Drawing Materials (Inks and Crayons)
You can use a lithography crayon, charcoal, glass marker pencil, or any type of crayon with a grease content. If you want the effect of watercolor, it would be nice to draw with Tusche ink.

We need to make sure that we do not put our hands on the stone while doing this. When the drawing is done, you start to process the stone to prepare it for printing.
When the drawing is done you start to process the stone to prepare it for printing. The first step of processing your stone and preparing it for printing is called the ‘first etch’. What we want to do is to start the chemical process that prepares your stone to be printed.

After you draw on your image, the stone is still sensitive to grease, and we need to desensitize the stone. By using gum arabic and nitric acid, we will be starting the chemical process. You apply the gum arabic onto the stone, together with the limestone, creating a layer that we call the ‘absorbed gum layer.’
Step 3: The Chemical Etch (Desensitizing)
The gum arabic and the nitric acid will together help the grease from the drawing material get penetrated into the stone and create a greasy reservoir directly underneath your drawing. This is what your printmaking ink will hold onto because grease attracts each other.

Step 4: The Wash Out and Roll Up

In Lithography, we use a special printmaking ink. The first step to do when you wash out your drawing is to use turpentine to literally wash up and remove the drawing from the stone. At this point, you can only see a ghost image of the drawing you made and this is the grease that has penetrated into the stone from the first etch.

After that, you want to buff in a bit of the printmaking ink onto this stone and let the stone rest for about five minutes. After that, we will be using a leather roller to roll up the stone with printmaking ink. The stone created a thin layer of water and this is when the absorbed gum layer is helping to hold on to the water. After you sponge you want to straightaway roll with the printmaking ink onto the stone, which will attract the grease that is already in the stone and you can see your image building up again.

After you have rolled off your stone it’s time to do the second etch. The second etch helps to really establish the absorbed gum layer, to make sure that the stone is not sensitive to grease anymore. The second etch works in the same way as the first etch, you apply gum arabic onto the stone and also apply gum arabic mixed with nitric acid onto the stone. After you’ve done you’re second etch, you want your stone to rest for at least an hour, but then after the stone has been resting you can start printing your stone.
Step 5: The Final Print
To print your stone you need to have a special lithography press, you place your stone on the press and adjust the pressure for the stone because all stones have got different thicknesses. Then you want to wash out the ink that you have on the stone you use turpentine to wash it out.

Buff in the ink you will be printing with, and then you roll up the stone in the same way as you do when you’re rolling up to prepare it for the second etch. When you get the right blackness on the stone, you can start pulling prints. Between every paper, you need to re-ink your stone, and when your print starts to get grey, you need to add more into your roll as well.

References

Independent Artist | MFA | Graphics | Visual Arts | Print Making
Discover the work of Avidipta, an MFA-qualified visual artist, specializing in printmaking, graphics, and contemporary fine art. Explore projects, blogs, and exhibitions.